The demo application
Next.JS Use Cache
4 min read
Published Jul 3 2025
Guide Sections
Guide Comments
The demo application is just a simple Next.JS application to demonstrate use cache, cacheTag and cacheLife functionality.
nextjs-usecache-demo project on GitHub
A simple demo Next.JS application on GitHub to demonstrate points made in this guide
Main menu
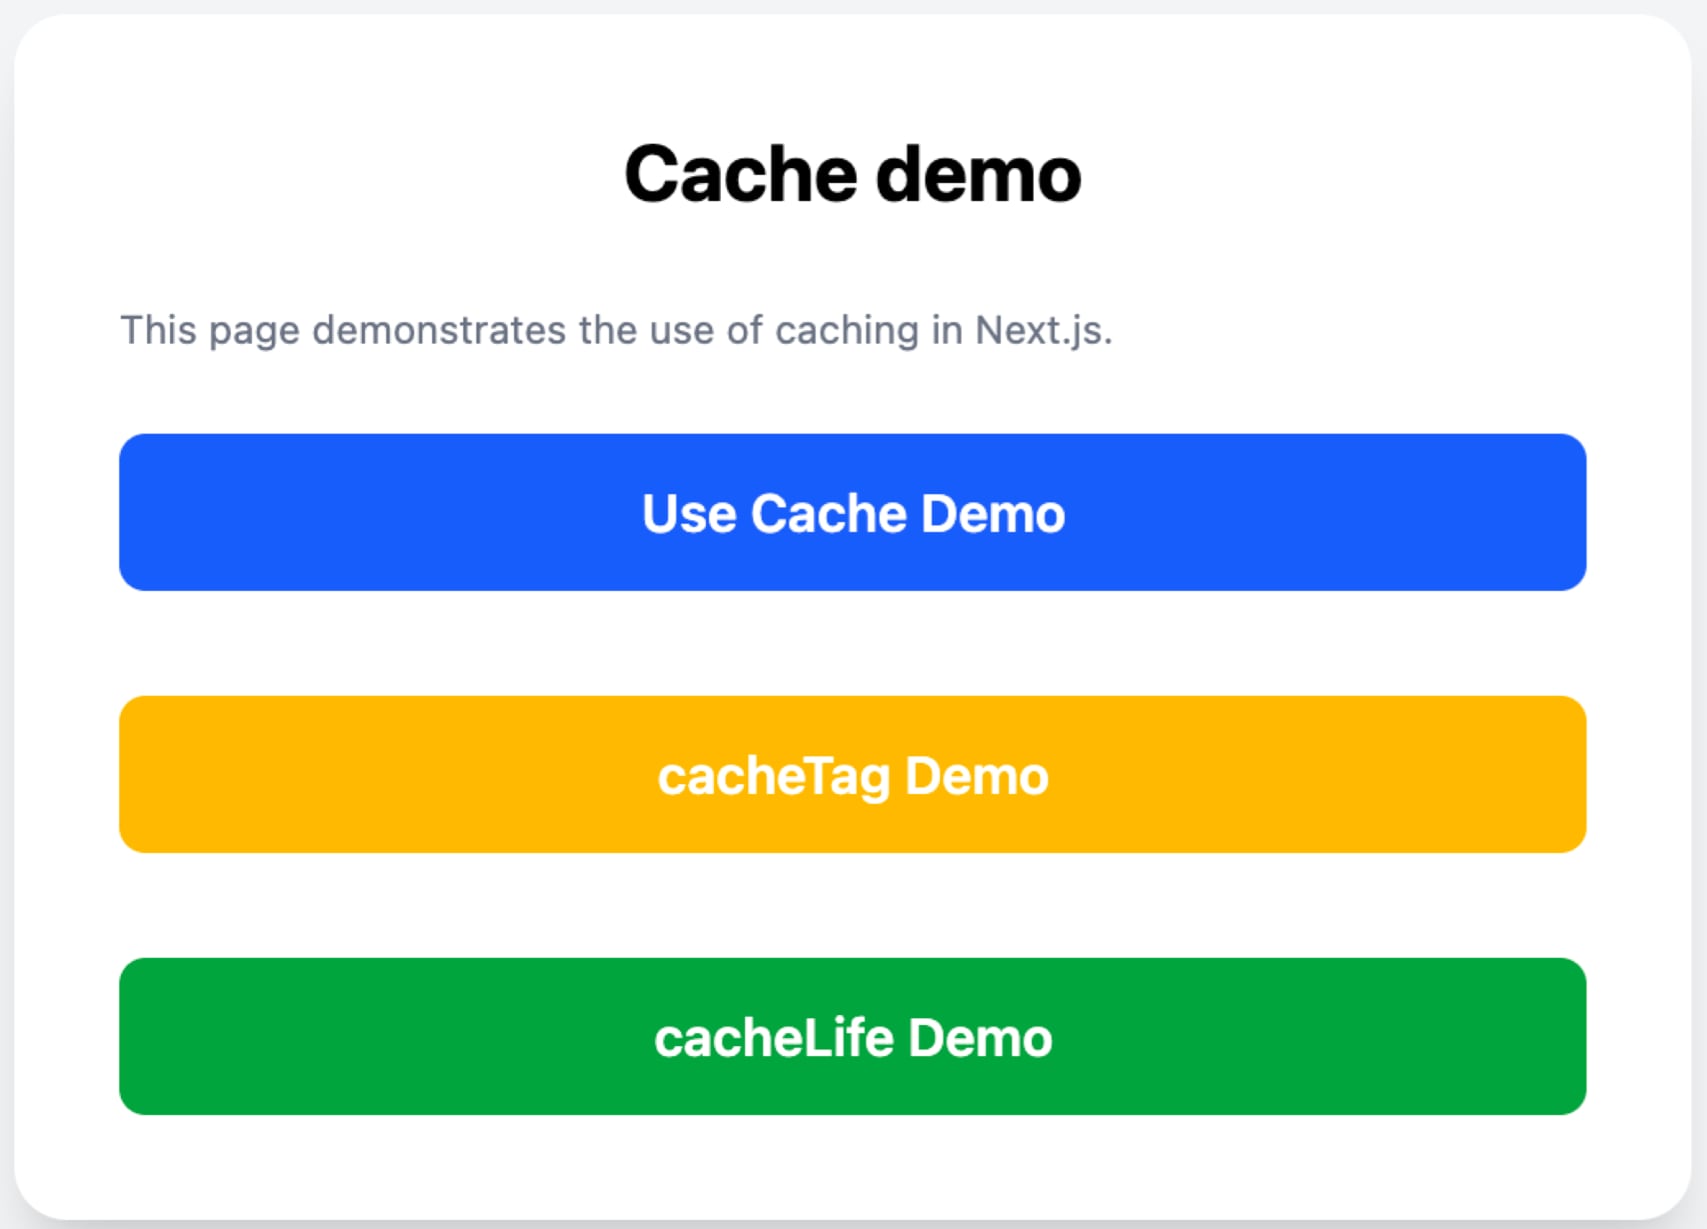
Select from the three options which demo page to open.
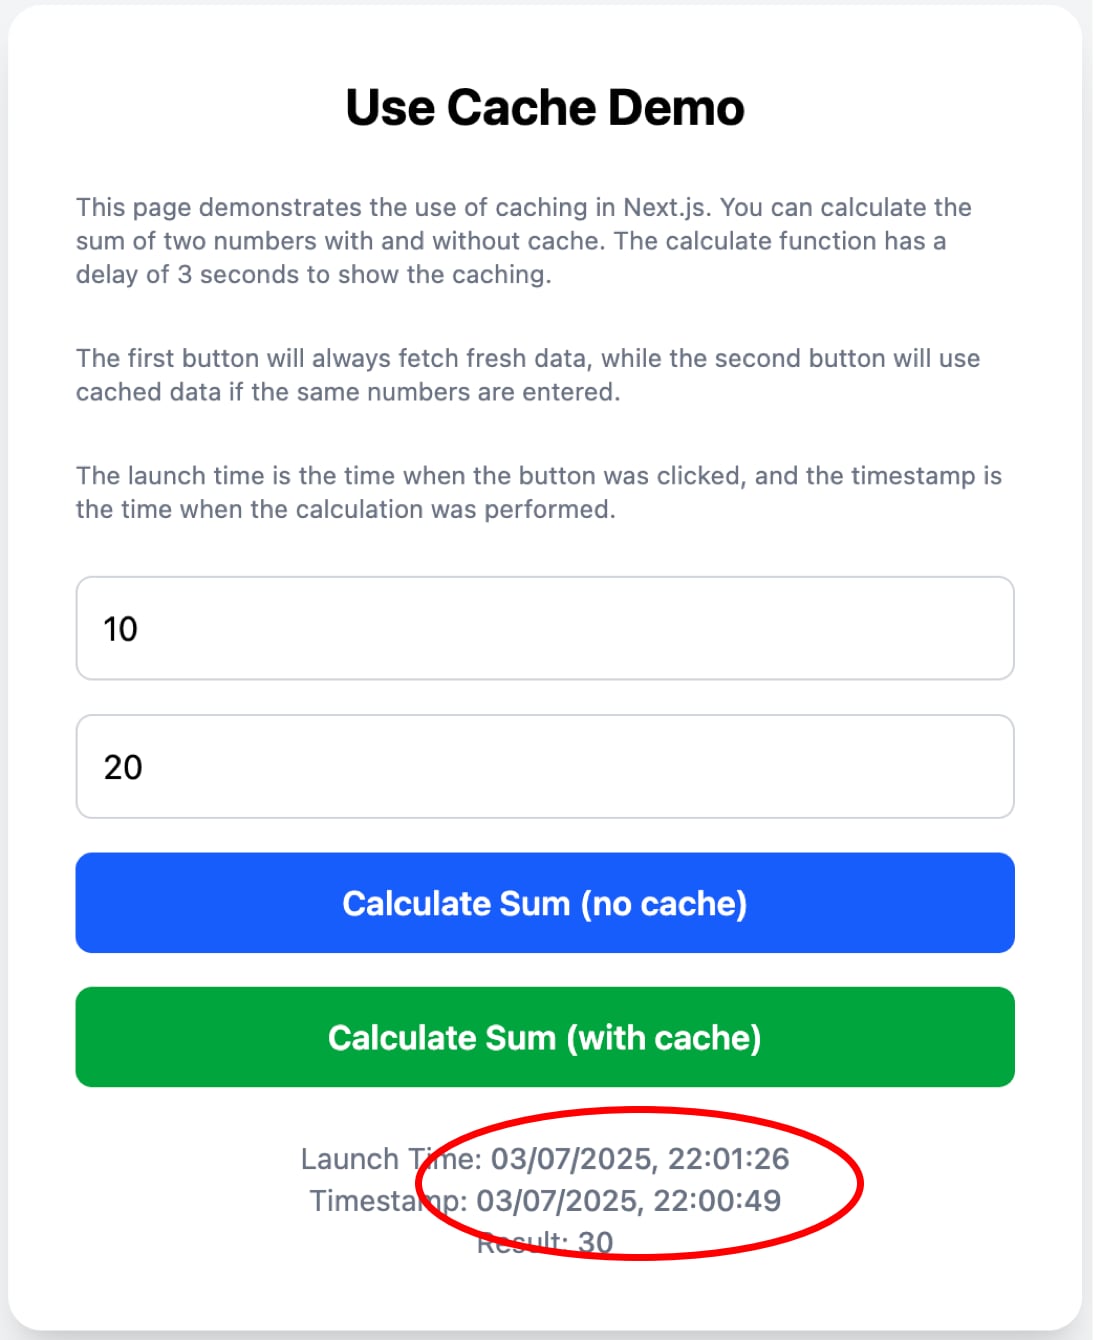
Use Cache Page
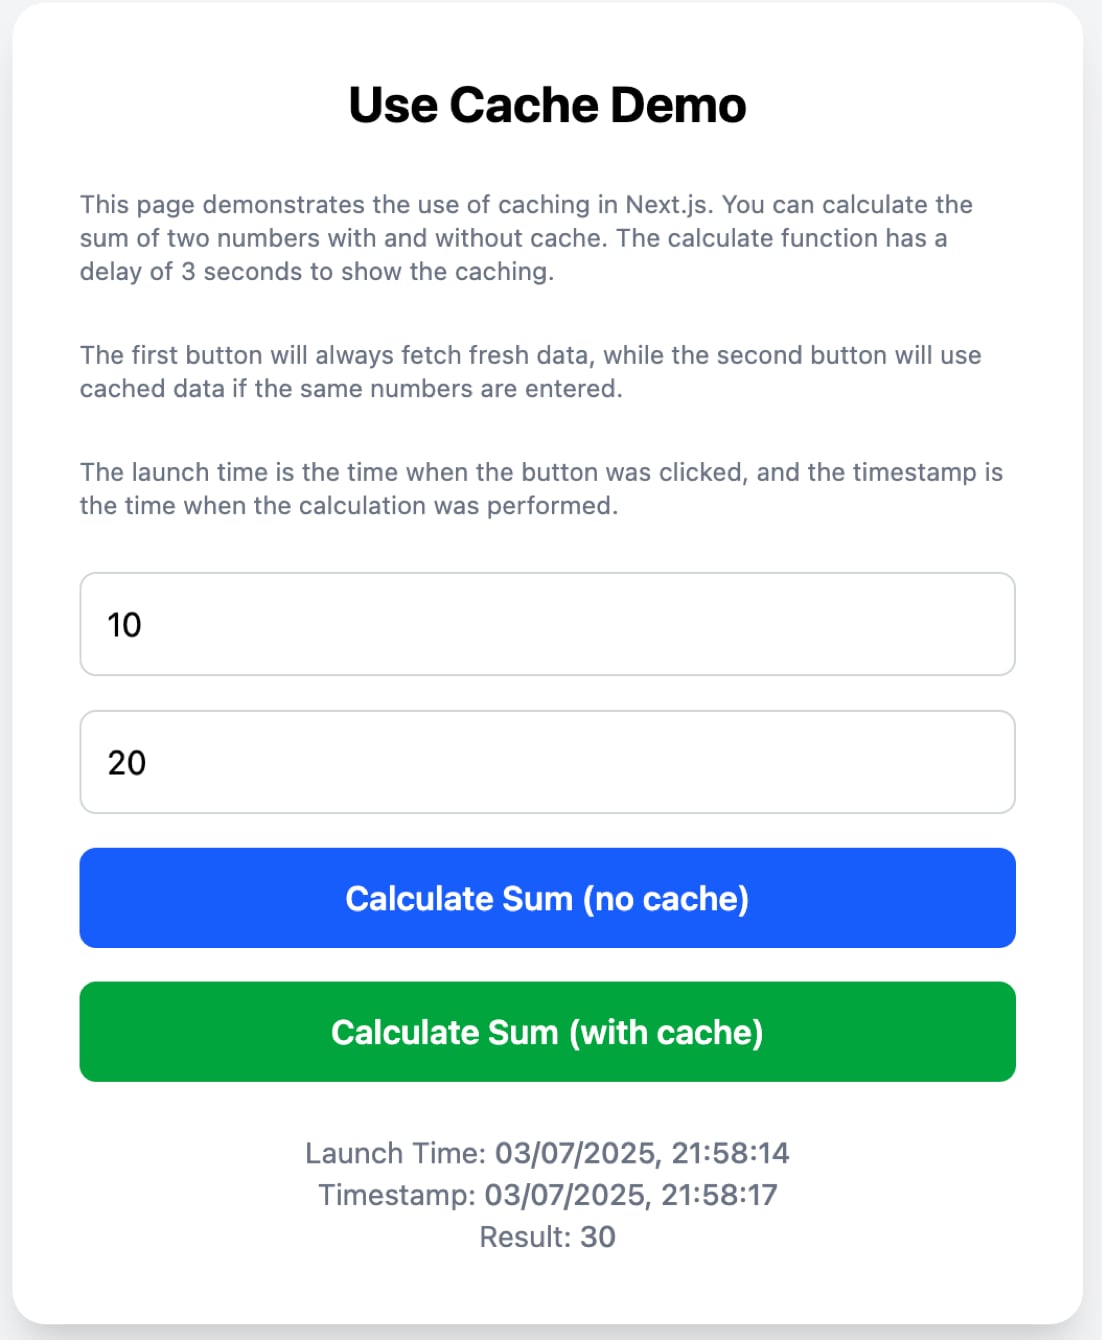
This page is to demonstrate caching turned on and off.
It has a server function that will sum the two numbers provided, and delay 3 seconds to simulate getting the data from a database.
If you fill in 2 random numbers in the 2 boxes and click the blue button, it will wait for 3 seconds and then display underneath:
- Launch time - timestamp of when the button was clicked.
- Timestamp - timestamp of when the data was calculated in the function.
- Result - The sum of the 2 numbers.
If you keep clicking the blue button, you will see the delay of 3 seconds every click and the timestamp value changing every time.
If you click the green button, you will see the 3 second delay on the first click and then future clicks it will be instant and the timestamp value will remain the same cached value, while the launch time will change each time the button is clicked.
If you change the numbers used, then the functions parameters changed so will create a new cache, ie. the first time it will take 3 seconds and set the timestamp but then future calls of the same parameters will be instant and cached value.
The blue button calls 1 function, the green button calls a copy of that function that has the use cache directive added. Other than that the functions are the same.
cacheTag Page
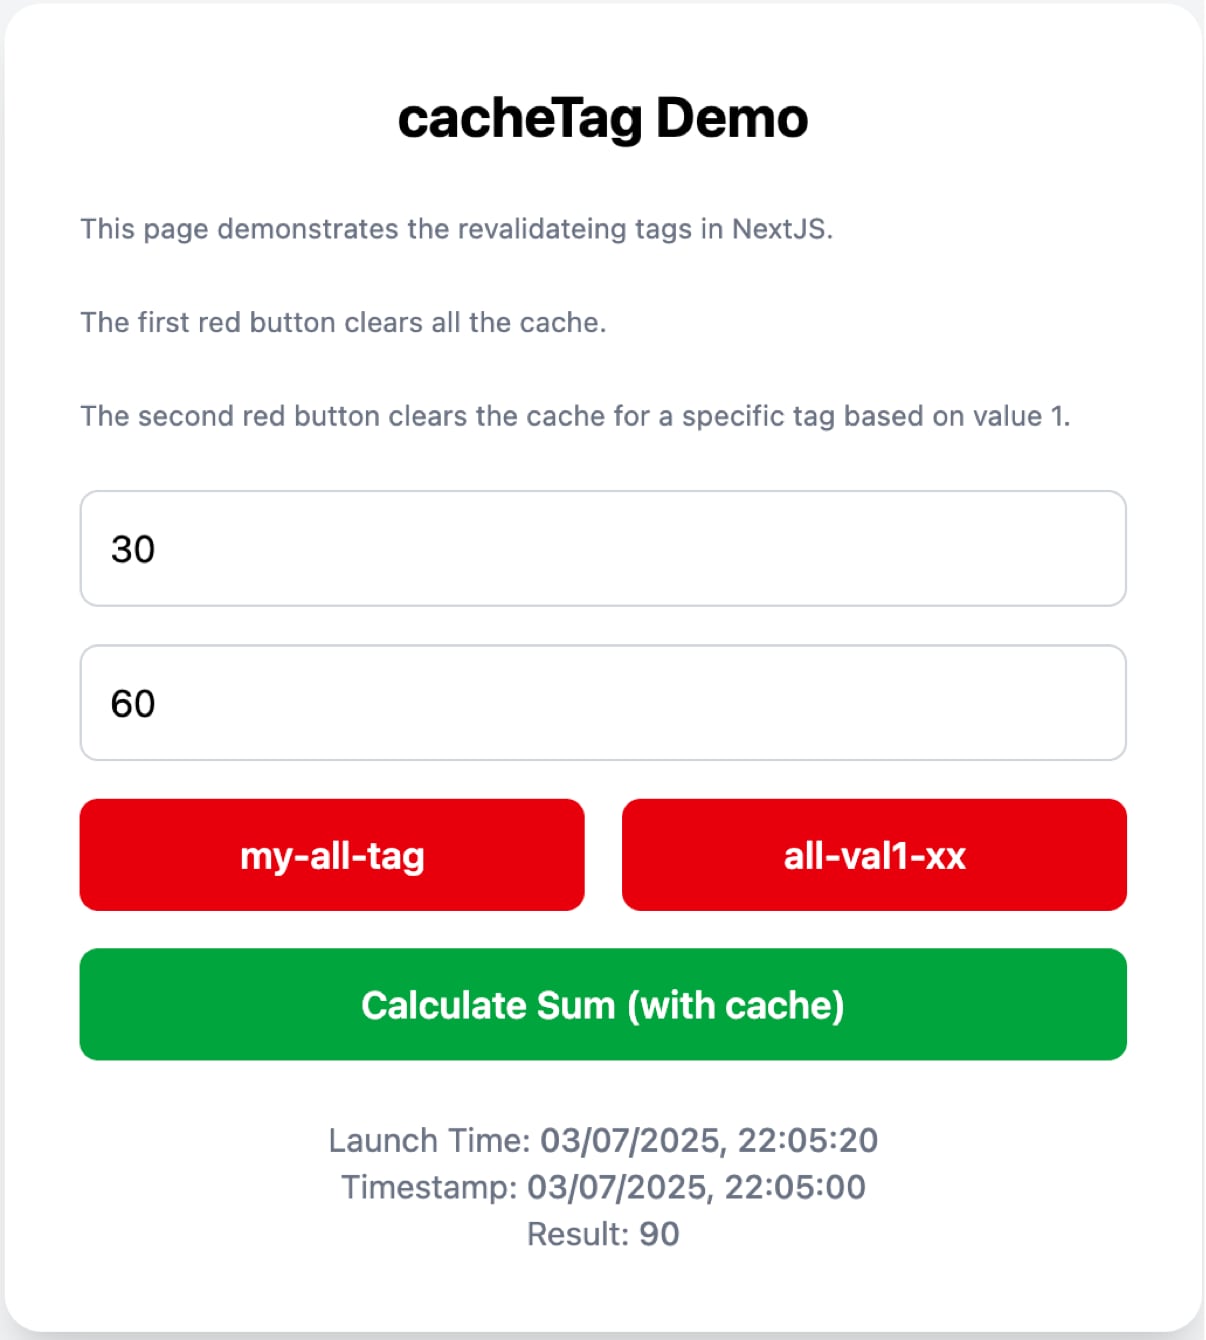
This page is to demonstrate using the revalidateTag function to clear the cache, either as a whole, or for a subset of results.
It has a server function that sums the numbers and returns a time stamp after a 3 second delay, like before, but also applies the cacheTag function to set 2 different tags. 1 that is a fixed string, and 1 that is a dynamic string made up with the value 1 parameter.
If you fill in 2 random numbers and click the green button, then it will wait 3 seconds and update the result and time stamps as before. Future clicks will be instant and show the cached value with just the launch time increasing.
If you then click the my-all-tag button it will call a server function that revalidates the overall tag so will clear the cache for all results. So future presses will wait the 3 seconds and update the time stamp. Showing that the cache is being cleared.
Now if you change the value of the first value and run it a few times and then change the value again and run a few more times. You will see that all those values then start caching the results.
If you then click the all-val1-xx button, it will clear the cache where the value 1 value is the current value, so you can see the cache is cleared by clicking the button again. Now if you go bak to a previous values that you had tested, you will see that that cache hasn't cleared and is still cached, until you press either of the 2 clear cache buttons.
cacheLife Page
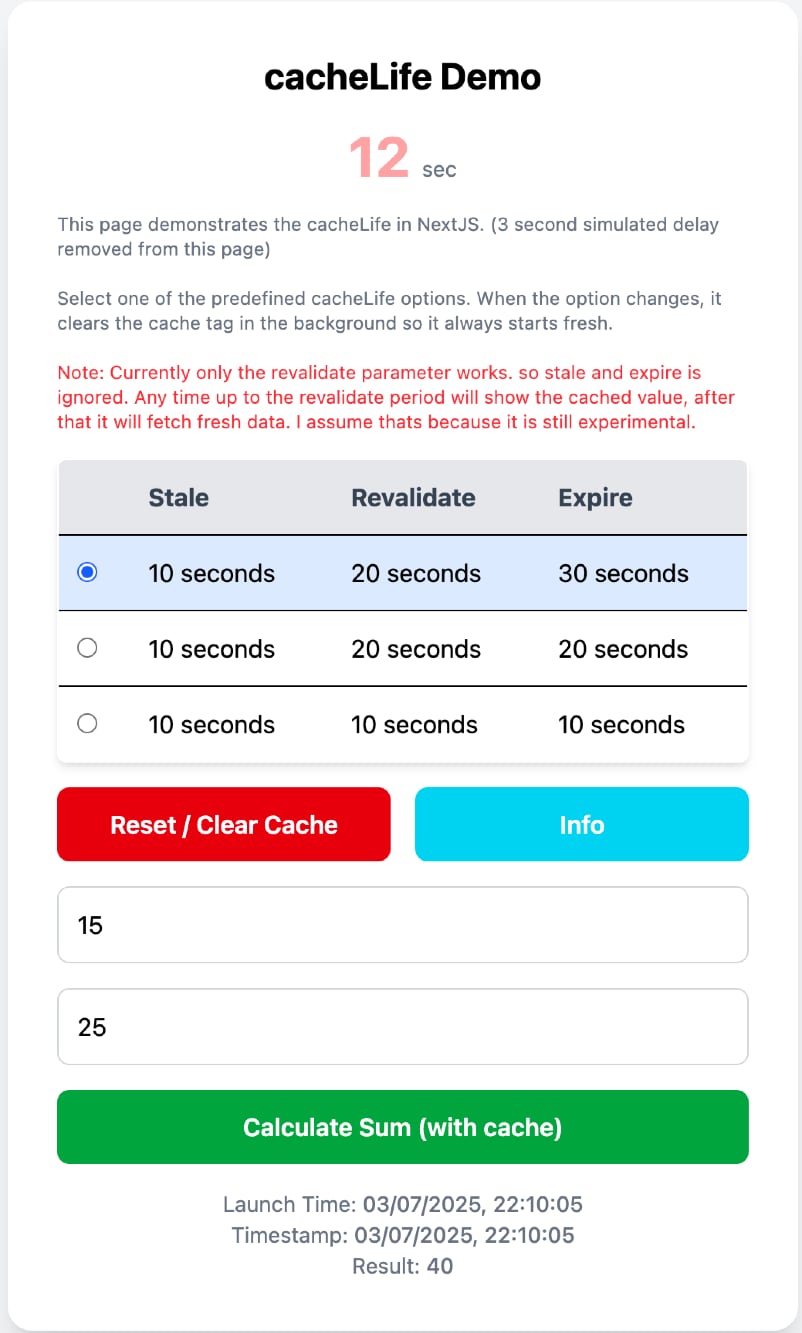
This page is to demonstrate setting the time you would like the results to be cached for.
Its similar to the other pages, but the 3 second delay has been removed so you can see more accurate timings.
There is an added seconds counter at the top that will start counting when you press the calculate button for the first time, this is just to help you know how long it has been cached for.
It has 3 example cacheLife values that have been setup, that all call pretty much the same function but with different cacheLife values set.
The red button resets the timer at the top and clears the cache tag.
The blue info button pops up a Javascript alert explaining what the current cacheLife selection should be doing.
At the moment though, you will find that if you keep pressing the calculate button, it will keep showing the cached value until the timer at the top gets after the revalidate centre time, and then it will clear the cache and refresh. So at the moment you will only see a difference if you select the first or third options. The first will cache the value until it gets to after 20 seconds and then will clear, the third will cache the value until after 10 seconds have elapsed.
I assume that when the use cache and cacheLife functionality finally make it in to the main release and are no longer experimental, that you will see more granular results.
Products from our shop
Docker Cheat Sheet - Print at Home Designs

Docker Cheat Sheet Mouse Mat

Docker Cheat Sheet Travel Mug

Docker Cheat Sheet Mug
Vim Cheat Sheet - Print at Home Designs

Vim Cheat Sheet Mouse Mat

Vim Cheat Sheet Travel Mug

Vim Cheat Sheet Mug

SimpleSteps.guide branded Travel Mug

Developer Excuse Javascript - Travel Mug

Developer Excuse Javascript Embroidered T-Shirt - Dark

Developer Excuse Javascript Embroidered T-Shirt - Light

Developer Excuse Javascript Mug - White

Developer Excuse Javascript Mug - Black

SimpleSteps.guide branded stainless steel water bottle

Developer Excuse Javascript Hoodie - Light
